
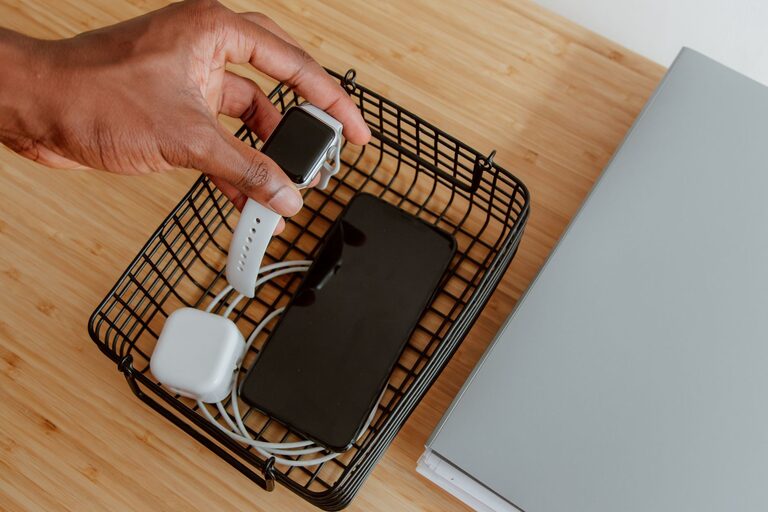
Setting up a dedicated charging station for your devices is a smart way to keep your electronics organized, fully powered, and ready to use. Whether you have smartphones, tablets, laptops, or wearable tech, a well-planned charging area reduces clutter and saves time searching for chargers and outlets. In this guide, we’ll walk you through everything you need to create an efficient, tidy charging station at home or office.
Why Create a Charging Station?
With the number of gadgets we use daily, charging them all can become chaotic. Cables tangled, devices competing for limited outlets, and chargers scattered around often lead to frustration. A dedicated charging station helps by:
– Centralizing all devices in one spot
– Reducing cable clutter and mess
– Protecting devices from damage by providing a safe spot
– Making it easier to monitor charging progress
– Improving the overall look and feel of your space
What You’ll Need to Get Started
Before you begin, gather the essential items to build your charging station:
– Power Strip or Surge Protector: Choose one with multiple outlets and USB ports to handle several devices safely.
– Charging Cables: Have the correct cables handy for all your devices, such as USB-C, Lightning, or micro-USB.
– Charging Dock or Organizer: An organizer keeps devices upright and cables separated. You can purchase a ready-made charging dock or create your own.
– Labeling Supplies: Optional, but useful if many devices are charged here (like in a family setup).
– Cable Management Tools: Zip ties, clips, or cable sleeves help keep wires neat.
– A Suitable Surface: A small table, shelf, or drawer dedicated to the station.
Step-by-Step Guide to Setting Up Your Charging Station
1. Choose the Right Location
Select a spot that’s easy to access and near an electrical outlet. Popular locations include:
– Near your desk or work area
– A corner in the living room or bedroom
– A dedicated shelf or drawer in a common area
Avoid placing the station in direct sunlight or near heat sources to protect your devices.
2. Prepare the Power Source
Plug your power strip or surge protector into the outlet. Using a surge protector is highly recommended to protect your electronics from voltage spikes.
Ensure the power strip has enough outlets and USB ports. For example:
– A surge protector with 6 outlets and 4 USB ports
– A separate multi-port USB charger if needed
3. Organize Your Charging Cables
Sort your charging cables by type and length. If some cables are too long, consider coiling them neatly or shortening unused lengths with cable ties.
Use cable clips or holders to attach cables neatly to the edge of the charging station surface. This prevents cables from slipping behind furniture.
4. Arrange a Charging Dock or Organizer
If you bought a multi-device charging dock, place it centrally on your surface. Otherwise, arrange your devices on a stand or use DIY organizers like:
– Small boxes or trays to hold devices upright
– Binder clips or stands to separate devices
– Repurposed kitchen racks or shelves to keep devices accessible
Make sure there’s enough space between devices to prevent heat build-up.
5. Connect Devices and Test
Plug each charging cable into your power strip or USB hub. Connect your devices one by one and check that each is charging properly.
If you have similar devices (like multiple phones), consider labeling cables or charging spots to avoid mix-ups.
6. Maintain and Update Regularly
Keep your charging station dust-free and check cables periodically for wear and tear. Replace any damaged cables immediately.
As your device collection grows or changes, make adjustments to your charging station setup to accommodate new gadgets.
Tips for an Efficient Charging Station
– Use fast chargers where possible: This reduces charging time for compatible devices.
– Avoid overloading outlets: Check the power ratings of chargers and devices to prevent electrical hazards.
– Keep devices on stands: This improves airflow and prevents overheating.
– Incorporate wireless charging: If your devices support it, add a wireless charging pad for convenience.
– Use smart plugs or timers: Automate charging times to save energy.
– Keep a few spare cables: Handy for guests or unexpected needs.
DIY Ideas to Personalize Your Charging Station
– Decorative boxes: Use fabric-covered boxes or baskets to hide cables and chargers.
– Wooden stands: Create a custom wooden organizer with slots for devices and cable holes.
– Repurposed items: Use old photo frames, spice racks, or magazine holders to hold devices.
– Label everything: Use washi tape or tags for a colorful, personalized touch.
Final Thoughts
Creating a charging station is a simple but highly effective way to keep your devices organized and powered up. With a bit of planning and some basic supplies, you can build a functional and tidy charging hub that fits your space and lifestyle. Start small and improve your setup over time to match your evolving tech needs.
Enjoy the convenience of having all your devices charged and ready at a glance!